Posts with the label recipe
Showing posts with label recipe. Show all posts
Showing posts with label recipe. Show all posts
Friday, July 24, 2020
Black Bean Quesadilla - Low Carb
BLACK BEAN QUESADILLA
(12 net carbs per quesadilla)
Recipe makes one quesadilla
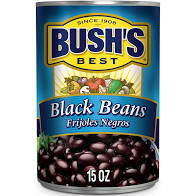
1/4 cup black bean, rinsed and drained
1 Tbsp. green pepper, chopped
2 Tbsp. onion, chopped
1/4 cup Mexican blend shredded cheese
1/4 cup Ole mild queso cheese dip
1/4 cup tomatoes, chopped
1/2 cup romaine lettuce, chopped
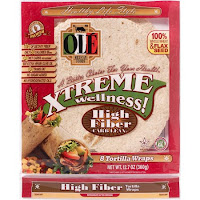
1 Ole low carb quesadilla wrap
Heat an iron skillet to medium high. Lay out flat one low carb quesadilla. Place beans on one side of quesadilla. Leave enough room to flip over to close. Sprinkle green pepper, shredded cheese and one tbsp. onion onto the black beans. Close quesadilla matching the ends as closely as possible. Spray Pam or any non-stick spray into your hot iron skillet. Transfer your closed quesadilla to the skillet. Spray the quesadilla with Pam. Brown the under side. Carefully place a spatula under the open side and roll over slowly, backward, in the pan. This backward movement instead of flipping allows the ingredients to stay inside the quesadilla. If you try to flip, it will spill. Brown the under side. Once browned, remove quesadilla and place onto a plate. Microwave the cheese dip for one minute. Pour over quesadilla. Top with tomatoes, lettuce and remaining onion. Enjoy!
Below are the items I use to make these delicious, super quick and easy, quesadillas. They are a real family pleasing lunch or dinner. My daughter Sloane brought this recipe to me from college. I've made it ever since, about eight years now. Please comment to tell me how much you love them!
Cooking365,
Thursday, January 2, 2020
3-Ingredient Southern Biscuit Recipe
3-Ingredient Southern Biscuit Recipe
1 1/2 cups White Lily Self-rising Flour
2/3 cup or more buttermilk
1/2 stick frozen butter
2/3 cup or more buttermilk
1/2 stick frozen butter
Preheat oven to 425. Place flour into a glass mixing bowl. Grate butter into flour and combine. Pour in buttermilk to form a ball with dough. All flour should be in the dough ball. If too dry, add another tablespoon or two of buttermilk.
Turn dough onto floured wax paper. Knead with hands. Roll out with rolling pin, fold back over, knead and repeat the process again. Knead and roll precisely six times, this creates layers in the biscuits.
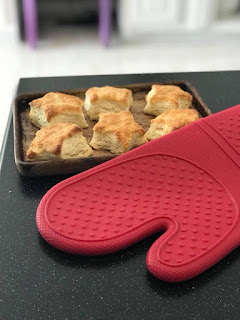
Roll out dough. Cut out biscuit with biscuit cutter. Place onto baking stone or pan with sides touching for best results. Bake for 18-22 minutes until desired browning is achieved.
Makes 6 biscuits. Recipe can easily be doubled.
Cook's Tip: Grate butter with a Pamper Chef or other brand cheese grater.
Here's to your kitchen 365,
Thursday, January 25, 2018
Doritos Chicken Casserole
 |
| Doritos Chicken Casserole |
As usual, I made a few substitutions to the recipe. They are listed below:
- I bake my chicken for 15-20 minutes seasoned with Pampered Chef Southwest Seasoning
- I use Progresso Mushroom soup (gluten free)
- I omit the Cream of Chicken (because it contains gluten)
- I prefer Sharp Cheddar instead of Velveeta
- I bake it in my beautiful Pampered Chef Rockcrok Everyday Pan
Please! Leave me a comment. I want to know how you like the recipe for Doritos Chicken Casserole.
Could eat it 365,
Tammy
Tuesday, March 22, 2016
Eat More Collard Greens Like This!
If you're trying to find a way to eat more collard greens with something other than pinto beans and cornbread, Eat More Collard Greens Like This!
On a hysterical whim with a blank mind and collard greens I needed to use, I prepared to cook dinner. I googled "recipes that use collard greens". I found a recipe from the Food Network called Spaghetti with Sauteed Collard Greens and Bacon. You can't go wrong with bacon and pasta, right?
I tried the recipe subbing the spaghetti noodles for some large rigatoni noodles I needed to get out of my cabinet. Can you tell I'm trying to use my groceries on hand before buying more? This recipe is DELIZIOSO! Delicious. Did you know?
The cholesterol-lowering ability of collard greens may be the greatest of all commonly eaten cruciferous vegetables. Find out more benefits of collard greens here.
Collard Greens are packed full of vitamins, anti-inflammatory properties and cancer-fighting goodness. You may think you don't like collard greens. Don't write them off until you eat more collard greens like this!
Successful sigh,
Tammy
The Happy Handicap
Monday, February 15, 2016
10 Time-Saving Tips for Making Pink Popcorn
 |
| OUR BEAUTIFUL PINK POPCORN! |
Ever made pink popcorn? Me neither. But, now I have. I'd be doing you an injustice if I didn't share my 10 Time-Saving Tips for making Pink Popcorn that I learned by trial and much error. First, a bit about me. I have two personality traits that annoy even me.
1) I think I can do ANYTHING! Really, I can. I mean I hope someone don't ask me to lock myself under water and try to get out like the Great Houdini, but short of that, I.can.make.pink.popcorn. How hard can it be?
2) I can't say NO. If there's a need, I think I'm the answer. Sometimes it's just better to say "No, I really don't know anyone who can make pink popcorn." and go on about my day...unless it's for a great cause like the American Cancer Society and Pamper Your Princess Day and the person who needs the popcorn is a long-time friend! Because what Princess don't deserve a mouthful of delicious, sugary, dreamy pink popcorn!
Anyway, I'm schooled in the art of pink popcorn making so it's only fair I share the 10 time-saving tips my mom and I learned. Btdubs, my mom gave me the two horrid traits so she's always my project recruit! Ready to make some popcorn!
We tried several recipes. We found the best one here at Domestic Dreamboat. Her recipe coats 24 cups of popcorn perfectly and is DELICIOUS! After much trial and error, here's our 10 time-saving tips for making pink popcorn.
1. The way NOT to do it. Microwave in a Pampered Chef Rice Cooker with oil, butter, food coloring, popcorn, Karo syrup and sugar. The rice cooker is in the trash. Burnt it up! Don't try the microwave method in a glass container, does not work either. This is what you'll get...
2. Give your air popper a rest every batch (24 popped cups). Your air popper will wind up in the trash heap if you don't, burnt up just like the microwave popcorn.
3. Give your microwave a rest every batch (24 popped cups). Your microwave will wind up in the trash heap if you don't, burnt up just like the popcorn. Yes, we lost this microwave too!
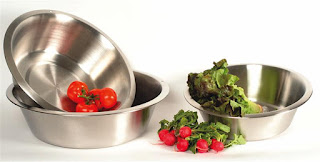
5. You'll need two large four-pound dishpans to measure and mix your pink popcorn. Divide a 24-cup recipe using 12 cups of popcorn per dishpan for best results. When popcorn is coated pour all into one pan and continue to mix until popcorn is coated evenly. The kind we used is pictured below.
6. Wax paper works well to cool the coated popcorn on. Try to lay your popcorn in a single layer for quick cooling. The pink coating will harden as it cools. Your popcorn should break apart easily for packaging.
7. Reduce sugar by adding plain popcorn to a batch of pink popcorn. Children eat way too much sugar! We experimented adding some extra white popcorn to each pink batch to reduce the amount of sugar per package. After our 24 cups of popcorn were pink coated, we added about 6-12 cups of uncoated plain white popcorn to the pink and mixed it. Worked very well.
8. We used Wilton Pink Icing Color. Worked well but it's difficult to measure. We had varied colors of pink popcorn which weren't really a problem....see #9.
9. We used Wilton Color Mist to supplement color (just spray it on);
a) to color some of the white popcorn we added, and
b) to add more color if our pink mixture just wasn't pink enough for princesses!
10. We produced 80 princess bags of pink popcorn in 4.5 hours containing about 1 1/2 cups of popcorn each! We made four batches of the pink popcorn recipe adding plain white popcorn every batch. We found one of our batches (after compression of pink candy syrup and the addition of 6-12 cups of white popcorn) filled 20 bags. Our time includes trial and error and success and we are not slow studies either.
A blown up air popper, a burned out microwave, five brown paper sacks and two exhausted old ladies were sacrificed making pink popcorn but no animals were harmed! I told my friend if anyone wanted to know who made the pink popcorn, please don't mention our names (we can't make anymore)! lol Pink Princess Popcorn was a great one-time experience. I hope the Princesses enjoyed every minute of it! Contrary to what this blog might imply....We did!
 |
| She's smiling but can't keep her eyes open! |
Resting in pink,
Tammy
The Happy Handicap
Tuesday, June 23, 2015
Pinterest Recipe Review: Fish Tacos with Watermelon Salsa
Pinterest Recipe Review: Fish Tacos with Watermelon Salsa
- Save time ( always great recipes)!
- Save money (no wasted ingredients)!
I found the recipe for Fish Tacos with Watermelon Salsa at dryhyman.com. I pinned it. This recipe intrigued me so much I made it the day after I first read the ingredients. The dish turned out beautifully, so colorful and delicious!
Find the recipe here. I did not make a single modification to this recipe. The salsa is very easy to make with a combination of taste from sweet to tangy. I used white flaky grunts caught in Panacea, Florida by my brother and sister-in-laws. Dr. Hyman's Special Seasoning added to the flavorful enjoyment of this gluten-free dish. I used my Pampered Chef Grill Pan to put a sear on the fish. Marking this one as a healthy family favorite!
Tammy's Taste Stats for Flavor =
1 =save your time, 2 =try if you got the goods, 3 =just so-so, 4 =close to Mom's and 5 =grab a recipe card
Preparation Difficulty =
1=kid proof, 2=easy, 3=worth the time, 4=difficult and 5=enroll in culinary school
Easy Mediterranean Chicken is a FIVE for flavor
and
2 for E.A.S.Y.
Took about 15 minutes including cooking the fish!
Never buying a fish taco again.
Making it myself,
Tammy
The Happy Handicap
Friday, December 19, 2014
Easy Appetizer for The Office Potluck
So you need a quick, easy appetizer for the office potluck. I have just the things you need to make a 2-minute Dip that will make you the talk of the office! All you need is one 8 oz. pack of cream cheese, Three Onion Rub and a Garlic and Brie Baker. Where do you get the rub and the baker?
 |
| ORDER THE RUB HERE |
 |
| ORDER THE GARLIC & BRIE BAKER HERE |
Simply place the cream cheese in the Brie Baker. Sprinkle 1 to 2 tbsp. Three Onion Rub onto the cheese. Season to your tastes using as much or as little rub as you like! Pop into the microwave covered on HIGH for two minutes. Remove, stir and serve with your favorite party crackers! Delicious!
You might also like a small bamboo spoon to stir with and the bamboo platter to serve your jaw-dropping magic dip on....Make this easy appetizer for the office potluck just minutes before serving in the office microwave. Too convenient, too easy, 2 minutes!
Star of the party,
Tammy
The Happy Handicap
Saturday, April 19, 2014
5-Minute Restaurant Quality Fajita Seasoning (Gluten-free)
 | ||
| photo credit: allrecipes.com |
Saturday, April 12, 2014
Healthy and Yummy Breakfast Smoothie
 |
| I am not a medical doctor. I am in no way suggesting this tonic will relieve any diseases or help in any way medically. |
I love this quick, healthy and yummy breakfast smoothie. My kids like it too!
I know, I know! You were excited about WINE being in the smoothie. Wine would be a healthy ingredient to add. Wine is packed full of heart-healthy antioxidants and reservatrol according to The Mayo Clinic. I serve the smoothie in a wine glass because it's extra pretty and inviting to drink!
Click for the printable recipe:
2 Heaping TBSPs Rice Protein Powder (burns fat)
1 TBSP Borage Oil (an inflammation reducing fatty acid)
2 scoops Nature's Sunshine Ultimate Greenzone (provides 1/2 your greens for the day)
1/2 cup frozen sweet dark red cherries (antioxidant)FYI I created this smoothie as a result of taking Nature's Sunshine Ultimate Greenzone. I just can't seem to eat as many veggies as I should per day. Tammy's Healthy Tonic is a delicious way to make sure you're eating your veggies, burning some fat and reducing your arthritis pain.
Bottoms up,
Tammy
The Happy Handicap
Subscribe to:
Comments (Atom)


